
A perfect, warm cinnamon roll is one of those desserts that anyone cannot turn down. It is a dessert that feels like a warm hug. I know that it’s summer, and warm hugs are equivalent to sweaty hugs right now, but I feel like cinnamon rolls shouldn’t be eaten only during a specific season. We should get to eat cinnamon rolls anytime we want to.
There are very few things that are better than a lovely, fresh cinnamon roll that’s served straight out of the oven. With the weekend approaching, I thought that there is no better time than now to share my recipe for brioche cinnamon rolls. This recipe is perfect for a weekend baking project; you can start on Friday night and make the cinnamon rolls on Saturday and enjoy them till Sunday!
Traditional cinnamon rolls are delicious, they are incomparable, but I decided to add a twist to the classic cinnamon roll by using a brioche dough to make them. Brioche is a highly enriched bread, and I’ve found that it results in an incredibly soft and fluffy cinnamon roll.
I will acknowledge that this recipe for cinnamon rolls is on the unhealthy side, and it calls for a shit ton of butter. But you must indulge in a super buttery treat once in a while; it’s called self-care.
Now, traditional brioche calls for eggs. Eggs and butter are what makes it so rich and delicious. But I’ve decided to omit the eggs and use buttermilk instead.
Cinnamon rolls are far less complicated than you might think, and they’re super tasty. They call for simple pantry ingredients and not a lot of elbow grease.
So, without further ado, let’s get into it!
This post, as usual, will be comprised of three parts:
What’s in a cinnamon roll?
What equipment do you need?
What’s the recipe for these cinnamon rolls?
What’s in a cinnamon roll?
Most of us love cinnamon rolls, and you are about to fall in love with those of you who have never tried it before. But where did the cinnamon roll originate from? Well, you can thank the gorgeous Scandinavian countries because that’s where cinnamon rolls come from. Cinnamon isn’t a spice that’s native to Scandinavia; Roman spice traders brought it to Europe from the South Asian country of Sri Lanka. Around the beginning of the 20th century, countries like Norway, Denmark, and Sweden had begun seeing the emergence of a sweet roll that used cinnamon in it. The Swedes, especially, love cinnamon rolls. They even have a national holiday to celebrate this dessert.
But honestly, the cinnamon rolls that we think of and know and love today is the North American one. The American one is not that different from the Scandinavian one; the only noticeable difference is the way it’s presented. Scandinavian cinnamon rolls are topped with pearl sugar or nib sugar and whereas the American ones are topped with either sugar glaze or a cream cheese icing.
So, what’s in a cinnamon roll? Traditionally, a cinnamon roll is made with a dough leavened using yeast and then filled with a layer of butter, ground cinnamon, and sugar. Some people also add raisins, pecans, and so on.

My recipe doesn’t use a simple yeasted dough. I use a dough that is an adaptation of brioche. I love brioche bread; it’s a highly enriched French bread that calls for a lot of butter and eggs, and it is soft and fluffy on the inside. It’s a beautiful bread, and it elevates cinnamon rolls in such a fantastic way. Of course, I’ve replaced the eggs with buttermilk since I wanted to do eggless cinnamon rolls.
Buttermilk is the residual liquid you have after making butter. You can easily make a buttermilk replacement by adding vinegar to some whole milk.
My recipe for brioche dough is also a no-knead one, meaning a machine and not your hands will do all of the work. I “knead” the brioche dough using my electric hand mixer for over twenty minutes. What it results in is a firm dough that sticks away from the bowl and doesn’t even stick to my hand. It’s glossy, shiny, and, like my roommate Sara likes to say, looks like a baby’s butt.
Everyone that I’ve fed these cinnamon rolls to has loved them. And, really, the only constraint here in this is probably the waiting time. The luscious brioche dough demands a cold environment, which is why these cinnamon rolls are overnight ones. I tried making this a one-day recipe, but since the brioche dough is so delicate and soft, it requires to be cold when you roll it into the cinnamon roll spiral. And, that requires refrigeration. Therefore, I let the dough in this recipe rise overnight in a fridge instead of for an hour or so at room temperature.
Brioche bread on its own can be made on the same day. You just need to make the dough, shape it lightly, and then bake it. But when it comes to making brioche dough for cinnamon rolls, it needs to be strong and structurally sound. Otherwise, it’s just going to collapse and look shapeless when you form it into cinnamon rolls. For this reason, I’ve added some extra kneading steps and recommended an overnight rise.

After kneading the dough, we will be performing a technique called the stretch and fold (fig. 3). This technique will increase the gluten strength in the dough. You’ll need to place your hands in the bowl under the dough, lift a corner and fold it over itself. You will then repeat this on all four sides. I do this twice in fifteen-minute intervals for this recipe.
I stretch and fold one last time, but this time, I remove the dough from its bowl. You will need to fold the dough over in an envelope style and then shape it (figs. 4&5) before letting it rise overnight.

The filling is pretty easy; it’s only three ingredients: softened butter, brown sugar, and ground cinnamon. I like to mix all of these three ingredients to ensure that there is no uneven distribution of the filling inside. No one wants a portion that has only sugar or only cinnamon.

I love cinnamon rolls with a beautiful glaze on top. In this recipe, I’ll share how to make cream cheese frosting to top cinnamon rolls. And I know that cream cheese isn’t available everywhere, so I’ll also give you a recipe for a regular cinnamon roll frosting in the notes at the end.
Let us now proceed to talk about all the equipment you’ll need to make this recipe.
Equipment
Brioche is a kneading-intensive dough, and it can be quite tricky to manage such a rich, buttery dough without messing up. Which is why you need an electric mixer for this. Be it a hand mixer or a stand mixer; you need it along with a dough hook attachment. The machine will work for nearly 20 minutes, which is like 30 or more minutes if you knead brioche dough by hand. If you’re genuinely interested in baking, consider buying an electric hand mixer with at least two attachments (whisk and dough hook). They don’t cost a whole lot and are quite useful!
Other than that, you’ll need pretty standard equipment.
You can use any shallow, oven-safe pan to make cinnamon rolls. The pan’s shape doesn’t matter. You will also need some parchment paper. Parchment paper ensures easy removal of the rolls, but if you don’t have any, you will need to heavily grease your pan before placing the cinnamon rolls in it.
Lastly, of course, you need an oven to make these. I haven’t quite figured out how to make cinnamon rolls on a stovetop yet, unfortunately.
And, below listed are all of the pieces of equipment you need to make these cinnamon rolls:
Electric hand mixer/stand mixer
Medium-sized mixing bowl
Smaller bowls, a couple
Large bowl
Rubber spatula
Wire whisk
Cotton kitchen towel
Plastic wrap
Parchment paper
A baking tray
The Recipe for No-Knead, Eggless Brioche Cinnamon Rolls
Time: 2½ hours plus overnight rising
Yields: 8 cinnamon rolls
INGREDIENTS (Click For Grams To Cups Converter)
For the brioche dough:
87 grams (¼ cup + 2 tablespoons) lukewarm water
5 grams (1 ½ teaspoon) active dry yeast
75 grams buttermilk (70 grams lukewarm milk + 5 grams white vinegar)
265 grams (2 cups + 1 tablespoon) all-purpose flour
¼ teaspoon fine salt
50 grams (¼ cup) granulated white sugar
72 grams (¼ cup + 1 tablespoon) softened butter
Filling:
150 grams (½ cup) softened butter
50 grams (¼ cup) brown sugar
27 grams (3 tablespoons)ground cinnamon
Icing:
78 grams (¾ cup) icing sugar
42 grams (3 ½ tablespoons) cream cheese
30 grams (2 tablespoons) milk, more if needed
METHOD
The night before:
Add the yeast and a pinch of sugar (from the 50 grams/¼ cup of sugar) to the lukewarm water. Mix it and cover the container tightly with plastic wrap. Let the yeast bloom for about 8-10 minutes.
Meanwhile, mix the lukewarm milk and vinegar and let it also sit for 10 minutes.
In a mixing bowl, add the flour, salt, and sugar and whisk it for a minute until everything is combined.
Add the buttermilk and the bloomed yeast mixture to the dry ingredients.
Place the mixing bowl on a damp kitchen towel and turn the electric mixer on with the dough hook attached and knead the dough for about 2 minutes or until you start seeing a mass of shaggy dough. The dough might seem dry, but do not add any more water.
Add a spoonful of softened butter and continue kneading until the butter has disappeared.
Continue adding spoonfuls of butter and kneading them into the dough. Occasionally, turn off the mixer and scrape down the sides of the bowl.
By the time all of the butter has incorporated into the dough, it should look glossy, and the dryness issue from earlier will no longer bother you. If your dough still looks dry, start adding a tablespoon of water and knead it until you see a soft, shiny ball of dough.
Continue kneading for another 8-10 minutes. The dough should start sticking away from the bowl, you’ll have a clean mixing bowl.

Turn off the mixer and pull out a chunk of dough, stretch it using your fingertips until you see a translucent sheet of dough without tears. You can also just pull a side of the dough upwards. This is called the ‘windowpane test’ (fig. 7). If your dough maintains its structure without any significant rips, it’s ready.
Transfer the dough into a large bowl whose sides and bottom are well-oiled. Cover it with plastic wrap and let it rest for 15 minutes.
After 15 minutes, stretch and fold (fig. 3) for the first time.
Cover it and let it rest for 15 more minutes, and perform the stretch and fold again. Cover and let the dough rest for 30 minutes.
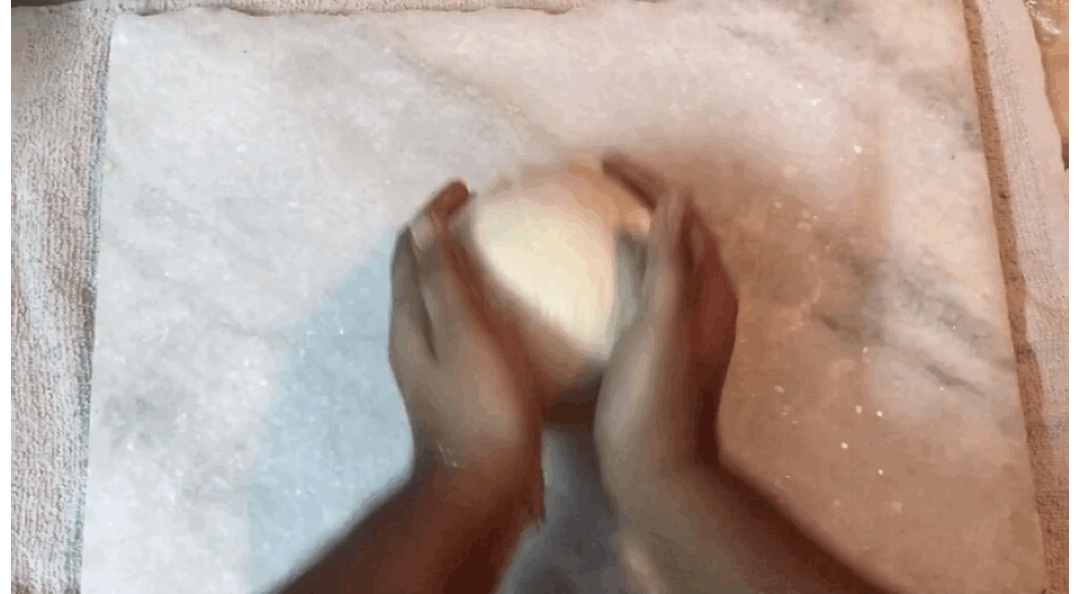
Turn the dough onto a clean surface and lightly shape it. First, fold the dough onto itself as if you were enveloping something from all four sides (fig. 4). Then, roll it upwards from the side closest to you. Next, pull the dough towards yourself while turning it around (fig. 5).
Place the ball of dough in the same oiled bowl and cover it tightly with plastic wrap and let it rise in the refrigerator overnight.
The day of:
The next morning, prepare the filling. In a bowl, mix the softened butter, brown sugar, and ground cinnamon using a rubber spatula.
Flour a work surface, and turn the cold dough from the fridge onto it.
Roll it into an 8x12 inch rectangle that’s about ¼ inches thick.
Spread the filling onto it evenly, reaching all the ends.
Starting from one of the shorter sides, roll the dough upwards tightly. (I made the mistake of rolling from the longer side; hence I didn’t have as many spirals.)
Carefully cut it into eight equal-sized pieces, about 1 inch in thickness.
Place the cinnamon rolls in a greased baking tray lined with parchment paper.
Cover it with a damp kitchen towel and let it proof for about 40 minutes or until they’re doubled in size and puffy.
Preheat the oven to 190°C about halfway through proofing.
Bake the proofed cinnamon rolls at 190°C for 20-25 minutes or until golden brown on top.
While they bake, make the icing.
Combine the butter and sugar using a whisk. Slowly, trail in the milk and cream cheese and whisk until you have a smooth icing. If it’s too thick, add more milk.
Let the cinnamon rolls cool down for about 5 minutes after taking them out of the oven, and then pour the icing on top. They’re best eaten warm.

Notes
Regarding icing: To make a non-cream cheese icing, mix 100 grams or ½ cup of icing sugar with 40-60 grams (3 to 5 tablespoons) of milk. Adjust the amount of milk depending on how thick you like your glaze.
So, that was the recipe for the best ever cinnamon rolls. They’re soft, fluffy, and incredibly rich! Let me know your thoughts in the comments below. If you try any of my recipes, please share your experiences with me on Instagram or Facebook!