
In my seven years of baking, I had never attempted making bread of any kind, until about a month ago. I purchased a box of active dry yeast last summer (2019), and I tried making a pizza, which went south so fast. Therefore, I never attempted using that box of yeast again. But, this time around, I felt more confident. I wanted to make a loaf of bread, no matter how. I made a loaf of sandwich bread, and I began challenging myself when it turned out perfectly. I wanted to tackle sourdough, and that will be a whole post on its own because there is so much that I want to talk about sourdough.
Now, many people and home bakers like me out there have ventured into breadmaking, or want to. I am not going to sugarcoat it for you; breadmaking is hard. It's not a child's play, and it certainly requires a lot of practice before mastering it. But, the difficulty that comes with breadmaking should never discourage you from making bread. The process of making bread is the most rewarding and satisfying feeling in the universe, and this feeling only intensifies with each loaf that you make. I am sure it's not a saying, but I firmly believe in "Once you start breadmaking, there is no going back."
I also understand that breadmaking is an intimidating topic which can push a lot of people away, you've probably never used yeast before, or you don't know how to knead bread dough, you can't tell whether the dough is proofed or not and so on. But, what if I told you that I have the best recipe for any first-time breadmaker?
Yes, the best recipe. It doesn't call for any yeast or any kneading or any proofing; in fact, it's pretty much an instant bread. I have realized that the bread this post is about is the perfect one to kickstart your breadmaking journey. It is such an encouraging loaf of bread, and it is so unbelievably easy to make.
This post is about a beautiful, rustic loaf of bread, which looks like the hands of a seasoned baker made it, but is the easiest damn bread on this planet. This post is about Irish Soda Bread.
As usual, this post will have three parts:
What is Irish Soda Bread?
What equipment do you need?
What is the recipe for Irish Soda Bread?
What is Irish Soda Bread?
Irish Soda Bread was created in the early 19th century when the first type of sodium bicarbonate or baking/bread soda was introduced in the UK. The Irish Soda Bread calls for the most basic pantry ingredients: flour, baking soda, and buttermilk. Buttermilk is a byproduct procured from making butter, and no, I am not going to ask you to make butter for this bread.
Funny enough, the Irish Soda Bread is not traditionally Irish; the process of using soda as a leavener in the bread instead of yeast was actually a method used by the Native Americans. The Irish later adopted this process and made it renowned across the world, hence the name Irish Soda Bread. The 19th century Irish loved this method so much because, at that time, their country was amidst a major economic fluctuation, which left them with fewer options when it came to food. They only had access to white flour, salt, baking soda, and sour milk, among a few other things. So, essentially, the Irish Soda Bread is a peasant's bread. But, trust me, it tastes brilliant. The bread is a little dense compared to yeasted loaves and has a neutral flavor, which makes it a fantastic base for sandwiches and toasts, you can serve it with pretty much anything from jam and butter to cheese and soup.
One thing that is different in my recipe is the type of flour used. Traditional Irish Soda Bread calls for white flour, which is nothing but your all-purpose flour. A lot of bakers also like using bread flour to make this bread. But, bread flour is not readily available in India; therefore, you can use all-purpose flour. But what I do is, I use a 1:1 ratio of all-purpose flour and whole wheat flour. I do this because I love the gorgeous color that the whole wheat flour gives the crust along with a more enriched flavor that you would probably not get with a 100% all-purpose flour bread. Plus, it's healthier!
Now, why use baking soda and buttermilk instead of yeast? How does it change the bread's texture? Does it do the same job as yeast?
When you add yeast to your bread dough, it feeds on the sugars in the flour and sometimes on the sugar that you add to it. By doing so, the yeast produces carbon dioxide, which leavens or causes the bread to rise, giving it those lovely bubbles and aeration. As you probably know, baking soda is a chemical leavening agent. When you add buttermilk to the dough, the acids in it react with the baking soda causing the expulsion of carbon dioxide, aka causing the bread to rise! So, yes, it pretty much does the same job as yeast. So, whenever you're in a pinch and don't have any yeast on hand, you can replace it with baking soda and an acidic substance such as lemon juice, vinegar or buttermilk. But, the Irish Soda Bread calls for buttermilk.
The next thing that probably will pop into your head is, "Is buttermilk the same as chaas/chaach/majjiga?" Many Indians, including me, will initially have this doubt the first time they hear about buttermilk. So, are these two the same? Yes and no. Technically speaking, buttermilk is the residue you have after making butter, and chaas/chaach/majjiga is an Indian refreshment drink made by churning yogurt with cold water and is more watery than buttermilk. Consider buttermilk and chaas/chaach/majjiga first cousins.
So, what should you use for making Irish Soda Bread? You need to use buttermilk, not chaas/chaach/majjiga. Since buttermilk is also not readily available in India and you shouldn't have to make butter from scratch to obtain some buttermilk. Lucky for you, you can instantly make buttermilk replacement by adding an acidic component to lukewarm whole milk, such as lemon juice or vinegar. Alternatively, you can also use some thick yogurt (not Greek yogurt or hung curd). Remember that this recipe calls for a thick substance, therefore use milk and vinegar or use yogurt that is on the thicker side. Don't use chaas/majjiga.
Lastly, the dough for an Irish Soda Bread is a little on the stickier side, which can undoubtedly scare off many people. But braving a sticky dough is the first milestone in breadmaking. Don't sweat; just keep working the dough, and even if it sticks to your working surface, just use a metal spatula or a bench scraper to lift it!
Equipment
The equipment you need for making a loaf of Irish Soda Bread is pretty standard. All you will need is two oven-safe pans, a mixing bowl, and preferably an electric hand mixer.
Why two pans? Most ovens project dry, hot air to bake whatever it is that you're baking. And, dry air can (obviously) dry out your bread, causing it to crack and dismember, which is why we must create moisture within the oven. And, this can be done by placing a pan of boiling water under the rack on which you have the bread. The boiling water will produce steam in an otherwise dry oven, and it will give your bread some excellent moisture and will allow it to bake flawlessly.
I know that a lot of people don't have an electric hand mixer or a stand mixer. Many times, when people see the words "electric mixer," they get scared of attempting a recipe. Now, a hand mixer is not of utmost necessity; you can always replicate its actions using your hands. But the hand mixer will obviously ease the process for you, and if you're planning on baking a lot more, then you should invest in a basic hand mixer. But, if you're going to do this only once, there is no need to buy an electric hand mixer; your hands and a spatula are good enough.
Another optional but recommended product that I use is some parchment or baking paper. I use a parchment paper layer between the baking tray and the bread; I find it easy to transfer the dough in and out of the pan. But, if you don't have any parchment or baking paper, feel free to omit it, but don't forget to flour the bottom of the pan.

A cross pattern on the top also recognizes the Irish Soda Bread, and it might look like a decorative element that you want to skip, but you shouldn't. The cross pattern is known as 'scoring,' and what it does is it lets all of the lovely steam inside the bread escape, so you don't end up with an overly gassy bread. As I said before, the dough is sticky, so you must flour your knife or razor blade when you're scoring the dough. And sometimes, flouring the blade can fail, and it can get caught in the mass of dough. But you must keep going, and you must make the cross. Later on, you can adjust it slightly with your fingers. Remember that this is not a posh bread; it is allowed to look a little gnarly.
So, for this particular recipe, you'll need the following equipment:
A 10-inch oven-safe pan
Another oven-safe pan (any size and shape)
A large mixing bowl
A wooden or rubber spatula
An electric mixer with the hook attachment (optional)
A razor blade or a sharp, small knife
A metal spatula or a bench scraper
Parchment or baking paper
The Recipe for The Best Irish Soda Bread
Time: 75-80 minutes
Yields: 1 loaf
INGREDIENTS (Click For Grams To Cups Converter)
470 grams (2 cups) lukewarm whole/full-fat milk
30 grams (2 tablespoons) white vinegar or lemon juice
250 grams (2 cups) all-purpose flour
250 grams (2 cups) whole wheat flour
1 teaspoon baking soda
½ teaspoon salt
12 grams (1 tablespoon) granulated sugar
56 grams (¼ cup) melted salted butter
50-60 grams (¼ cup) all-purpose flour for the bench and pan
METHOD
Make the buttermilk by combining the milk and vinegar and let it sit for 15 minutes until it curdles.
In a large mixing bowl, add the flours, baking soda, sugar, and salt. Whisk the dry ingredients together until incorporated, and no lumps are visible.
To the dry ingredients, add the melted butter and buttermilk.
Use an electric mixer with the hook attachment and form the dough. You can also use a spatula to form the dough, it will take a little longer, but it's alright.
The dough at this point can look a little scraggly, but that's okay. Work the mixture until it all comes together, and no stray or dry bits are left.
Now, preheat the oven to 220°C.
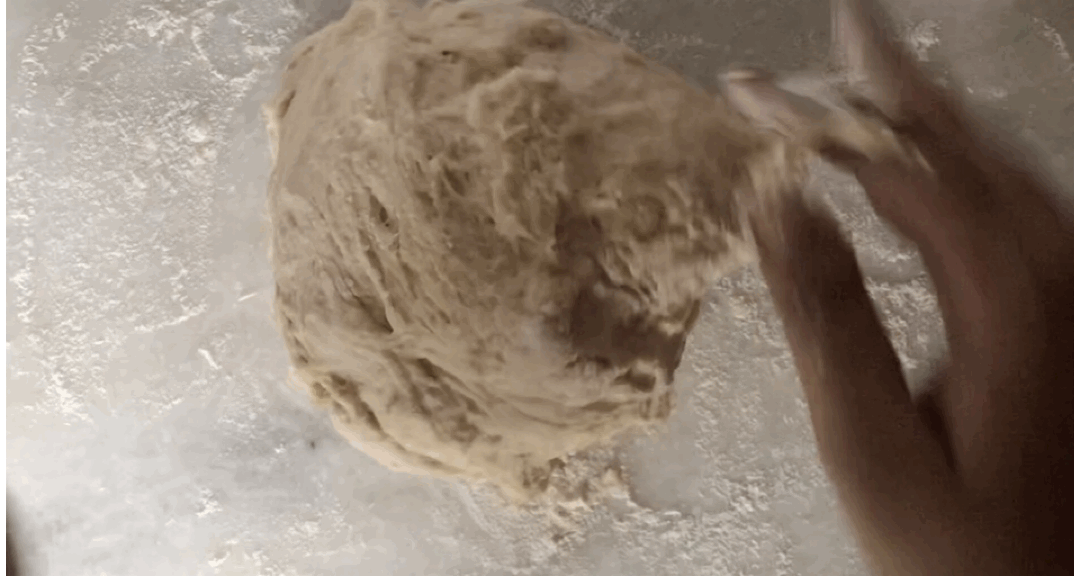
Turn the dough onto a well-floured surface and form it into a boule (ball in French).
Now, the dough might be a little sticky, but don't let that discourage you. You're going to place your palms right under the dough, lift it about a centimeter into the air, turn your hands clockwise and drop it. Repeat this for about four to five times. We're not looking for a tight ball of dough, just a uniform one.
Place the dough ball on a floured piece of parchment and transfer it to a 10-inch diameter baking tray. If you don' have any baking paper, flour the pan and transfer the dough directly onto it.
With a razor blade or a sharp but small knife, mark or score a sizeable 1-inch deep cross on top of the dough.

Below the rack in your oven, place another pan filled with boiling water. Now, place your tray with the dough on top of the rack.
Bake your bread at 220°C for 20 minutes and then at 200°C for 30 more minutes.
Carefully, transfer the bread to a wire rack or a plate, and cool for at least 30-40 minutes before cutting into it. Premature cutting can squish the crumb and may even result in a very dense bread.

Notes:
Many people probably own small ovens without space for a second pan with the boiling water. If you're one of them, you are most likely wondering if you should skip that step? The answer is: no. But, instead, you can do something else. Before you close the oven to start baking the bread, spray the insides of the oven and the dough with some water. Spraying water will produce the required steam without the need to place a pan of water in your oven!
Now, 50 minutes in the oven is more than enough time for the bread to be thoroughly cooked. But another trick to check whether it's done without cutting into it is by tapping the bottom of the loaf with your knuckles. If you hear a hollow noise, the bread is ready.
Also, note that in any case you should not use milk (to make the buttermilk replacement) that is too warm or even hot, it can cause premature reaction between the buttermilk and baking soda leading to a deflated and dense bread.
So, I made a small mistake of not scoring deep enough, which resulted in the bread to retain its boule shape. If you score your bread correctly, you will have a bread that looks something like this (the loaf in the following photo is from my previous attempt at making Irish Soda Bread):

So, that was the easiest, no-knead, no-yeast bread: the Irish Soda Bread. I hope you guys try it out and fall in love with this bread. And, let me know your thoughts in the comments below. If you try any of my recipes, please share your experiences with me on Instagram or Facebook!